
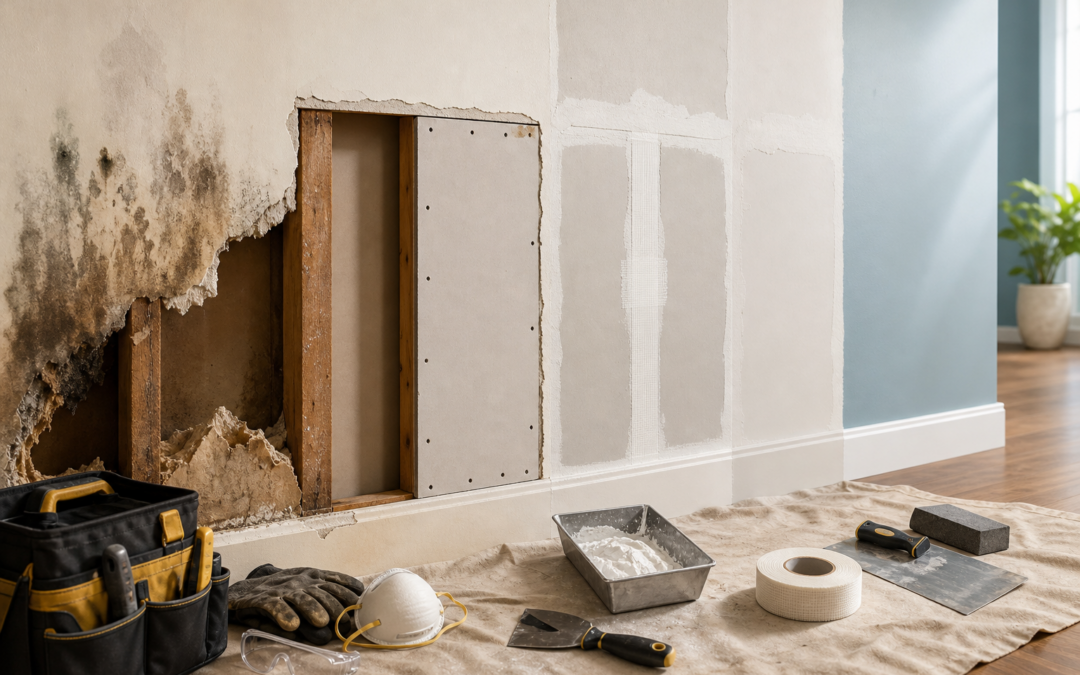
To repair water-damaged drywall, start by stopping the leak and shutting off utilities, then assess whether the drywall can be dried in place or must be replaced. Cut out damaged sections, patch with new drywall, tape and mud the seams, sand smooth, prime, and paint. Ceiling repairs and contaminated water damage raise the cost and complexity significantly, and in some cases DIY is not safe to attempt at all.
The water source matters as much as the visible damage. A clean pipe burst is a different problem from a sewage backup or floodwater intrusion, and the repair path splits early depending on what you're dealing with. This guide walks you through safety checks and water-category triage first, then the physical repair steps, so you know what you're actually facing before you pick up a utility knife.
Is Your Ceiling Leak Dangerous? Safety Checks Before You Touch Anything
Water and electricity are a dangerous combination, and a ceiling leak puts both in the same space. Before you inspect the damage or move anything, work through these safety checks in order.
Here are the steps to take before touching any damaged drywall:
- Cut off utilities first. Shut off electricity to any circuit that runs through or near the affected area. If the ceiling is wet and you're unsure which circuits are involved, shut off power to the entire floor at the breaker panel. Turn off gas if the leak is near a gas appliance. [S1]
- Look for bulging or sagging drywall. A ceiling that bows downward is holding standing water. Do not stand beneath it. Puncture the lowest point with a screwdriver to drain it in a controlled way before the weight causes a collapse.
- Check for active dripping near light fixtures or outlets. Water tracking into an electrical box is a shock hazard. Do not restore power to that circuit until an electrician confirms it is dry and safe.
- Assess for structural damage. If you see cracks running along the ceiling joists, soft spots in framing, or any sign that the structure above has shifted, stop and call a professional. Ceiling repairs require working overhead, and a compromised structure makes that dangerous.
- Test for lead and asbestos before cutting or sanding. Homes built before 1978 may have lead-based paint on the drywall surface or asbestos in the joint compound. Cutting or sanding disturbs both. Purchase a lead test kit and, if you have any doubt about the compound, have a sample tested before you do any demo work.
Only after you have confirmed the area is electrically safe, structurally sound, and free of hazardous materials should you move to the next stage.
What Type of Water Damage Do You Have? Categories That Change Everything
Not all water damage is the same, and the category of water involved determines whether your drywall can be saved or must come out entirely. Misidentifying the water source is one of the most common mistakes in DIY drywall repair, and it can leave hidden contamination behind a fresh patch.
The restoration industry uses three categories:
- Category 1: Clean water. This comes from a broken supply line, a leaking water heater, or rain intrusion through a roof or window. It carries no contaminants. Drywall saturated by clean water can potentially be dried in place if it is not crumbling or delaminating.
- Category 2: Gray water. This includes discharge from washing machines, dishwashers, or HVAC condensate lines. It contains biological or chemical contaminants at low levels. Drywall exposed to gray water should generally be replaced, not dried, because contaminants absorb into the paper facing.
- Category 3: Black water. Sewage backup, floodwater, or any water that has contacted human waste falls into this category. Drywall exposed to black water must be removed and replaced, full stop. Drying it in place is not an option. Mitigation for black water damage costs roughly double the cost of clean water mitigation per square foot, around $8 per square foot compared to clean water mitigation, which reflects the additional containment, protective equipment, and disposal requirements involved.
Identifying your category also affects whether you can handle the job yourself. Category 1 with a small affected area is a reasonable DIY project. Category 2 and Category 3 damage almost always require professional mitigation before any repair work begins. If you're unsure which category applies, treat it as the more serious one until you can confirm otherwise.
Temporary Fix for a Leaking Ceiling While You Plan Repairs
A temporary fix for a leaking ceiling is not about making it look better. It is about stopping the damage from spreading while you assess the full scope and gather what you need for a proper repair.
Follow these steps to limit further damage right now:
- Stop the leak at its source. [S2] This is the only step that actually stops the damage. If the source is a plumbing pipe, shut off the water supply to that line or to the whole house. If it is a roof leak, get a tarp over the affected area from the outside. If it is an HVAC condensate line, clear the drain or shut off the unit. Nothing else you do matters until the water stops.
- Relieve water pooling in the ceiling. If the ceiling is bulging, carefully puncture the lowest point with a screwdriver to drain the collected water into a bucket. This prevents a sudden collapse that could cause injury and spread water across a wider area.
- Protect your belongings. Move furniture, electronics, and rugs out of the affected area. Lay down plastic sheeting and set out buckets or towels to catch ongoing drips.
- Run a fan and dehumidifier in the room. You will not fully dry saturated drywall this way, but you can slow secondary moisture absorption into flooring and adjacent materials while you plan the repair.
- Document everything with photos. Take wide shots and close-ups of the staining, bulging, and any visible mold before you disturb anything. This documentation matters for insurance claims.
Do not patch or paint over the damage at this stage. Sealing wet drywall traps moisture and creates the exact conditions mold needs to take hold.
How to Repair Water Damaged Drywall: Step-by-Step Instructions
Once the leak is stopped, utilities are off, and you have confirmed the water source is clean, you can move to the physical repair. Do not start this stage until the drywall reads dry on a moisture meter. Drywall should measure at or below 1% moisture content before you patch; framing lumber behind it should read below 19% [S3]. Patching over wet material traps moisture and leads to mold growth behind the new surface.
Drywall saturated by a clean-water leak can typically be dried in 3 to 5 days when you run air movers and dehumidifiers continuously. Rent both if you do not own them. Check moisture readings daily and do not move forward until the numbers hold steady at the thresholds above.
When the area is confirmed dry, follow these steps in order:
- Assess whether the material is salvageable. [S3] Press on the drywall surface. If it crumbles, feels soft, or has separated from the paper facing, it must come out. Drywall that is still firm and has dried evenly can sometimes be kept, but any discoloration, warping, or odor is a sign to remove it.
- Remove damaged sections. [S4] Use a utility knife or keyhole saw to cut out the damaged area. Cut in a rectangular shape, not following the stain outline. Extend your cuts to the nearest stud on each side so the patch has solid backing. On a ceiling, mark your cut lines with a pencil before you start so you keep the rectangle square.
- Install new drywall panels or patches. [S5] For small holes, cut a patch from new drywall to fit the opening and secure it to scrap lumber backing with drywall screws. For larger sections, run the new panel edge-to-edge between studs and drive screws every 8 inches along each framing member. Ceiling repairs follow the same process, but use a drywall lift or a second person to hold the panel while you fasten it. Working overhead alone is slow and imprecise.
- Seal the seams and cover screw heads. [S6] Apply drywall tape over every seam, then spread a thin coat of joint compound over the tape and screw dimples with a 6-inch knife. Let it dry fully, typically 24 hours, then apply a second coat with a 10-inch knife, feathering the edges outward. A third coat is often needed on ceiling repairs because overhead lighting reveals every ridge.
- Sand, prime, and paint. [S7] Once the final coat is completely dry, sand the area smooth with 120-grit sandpaper. Wipe away dust with a damp cloth. Apply a stain-blocking primer before painting. Standard primer will not seal water stains, and the discoloration will bleed through the finish coat within weeks. Match the existing paint sheen as closely as possible.
Ceiling corners need extra attention. Water damage in ceiling corners tends to travel along the angle, soaking a longer section of tape than the visible stain suggests. When you cut out a corner repair, extend the cut at least 6 inches past the stain on both sides. Use paper tape rather than mesh in corners because it holds the angle better and is less prone to cracking as the structure moves.
For repairs near showers or other high-moisture areas, use moisture-resistant drywall, sometimes called green board, rather than standard drywall. It will not survive direct water contact, but it handles ambient humidity far better than standard panels.
How Much Does Water Damage Ceiling Repair Cost?
Cost depends on the size of the damage, the water category, and whether you hire a professional or do the work yourself.
For drywall repair overall, the national average in 2026 is $613, with most projects falling between $296 and $930, based on data from RapidEye's analysis of 36,945 verified projects. When water damage is the cause, that range rises. Water-damaged drywall repair specifically costs between $600 and $1,550 nationally, based on the same dataset.
Ceiling repairs tend to run higher than wall repairs because of the overhead labor involved. Water-damaged ceiling repairs typically cost between $450 and $1,600 depending on the severity of the leak, according to Angi's 2026 ceiling repair cost data.
Several factors push costs toward the higher end:
- Black water contamination. Sewage or floodwater exposure requires protective equipment, containment, and regulated disposal before any repair begins. That adds significant cost before a single piece of drywall is touched.
- Mold growth behind the surface. If mold has taken hold in the wall cavity, remediation must happen before patching. That is a separate scope of work with its own cost.
- Structural repairs. If ceiling joists or wall framing are rotted or weakened, they need to be sistered or replaced before new drywall goes up.
- Popcorn or textured ceilings. Matching texture adds labor time and often requires treating a larger area than the repair itself to avoid a visible patch.
For full water damage restoration, the national average in 2026 is $3,868, derived from 1,500 verified projects. That figure covers drying, demolition, and repair together, not just the drywall patch.
When Should You Replace Drywall Instead of Drying It?
If any of the following apply, replacement is the correct call.
Replace drywall when:
- It is crumbling, soft, or sagging. When drywall loses structural integrity, the paper facing separates from the gypsum core and the patch fails within months. A patch over compromised material is not a repair.
- It was exposed to sewage or contaminated floodwater. Black water saturates the paper facing and the gypsum core with biological contaminants that cannot be dried out. This material must come out. There is no drying-in-place option for Category 3 damage [S3].
- Mold covers more than 10 square feet. The EPA guideline is that homeowners can typically handle mold remediation themselves when the affected area is smaller than 10 square feet. Beyond that threshold, licensed abatement is required. If you pull back drywall and find mold spread across a larger area, stop the demo and call a professional. If you pull back drywall and find mold spread across a larger area, check mold behind drywall: signs, risks, and next steps to understand what containment and abatement involve before you go further.
- The drywall has been wet for more than 48 to 72 hours. Mold can begin growing within that window. Even if the surface looks clean, the paper facing may already be colonized.
- You are in a high-moisture area and used standard drywall originally. Drywall near showers, tubs, or exterior walls in South Florida's humid climate degrades faster than it would in a drier region. If the original installation used standard panels in a wet location, replace with moisture-resistant board.
If you are dealing with water damage in Dade County or elsewhere in South Florida and are unsure whether your drywall qualifies for drying in place, err toward replacement. The cost of a new panel is far lower than the cost of remediating mold that grew behind a patch.
When to Call a Professional for Water Damage and Mold
Some situations are beyond what a careful DIYer should attempt. Call a professional when mold covers more than 10 square feet, when the water source is Category 2 or Category 3, when you find structural damage in the framing, or when you need documentation for an insurance claim. According to data from the Insurance Information Institute, approximately 14,000 people in the U.S. face a water damage emergency every day, and the average insurance claim for water damage runs $12,514.
Royal Mold Specialist is a South Florida remediation company that sends trained technicians across more than 20 cities to handle mold inspection, water damage treatment, and full remediation. If the damage in your home goes past what this guide covers, that is the call to make.
FAQs
Why does my ceiling leak water when it rains?
Rain intrusion through a ceiling usually points to a failed roof membrane, a cracked flashing seal around a vent or chimney, or a clogged gutter that forces water back under the eave. In South Florida, storm season runs June through November and puts roofs under repeated stress. If the leak only appears during heavy rain, start your inspection at the roof penetrations closest to where the drip appears inside.
How do I fix drywall above a shower or in other high-moisture areas?
Use moisture-resistant drywall, sometimes called green board, for any repair near a shower, tub, or other consistently humid space. It handles ambient humidity better than standard panels, though it is not waterproof and should not have direct water contact. Pair it with a stain-blocking primer and a paint rated for bathroom use. Ventilation matters too: a bathroom exhaust fan that actually moves air out of the house reduces the moisture load on every surface in the room.
Can I paint over water-stained drywall without replacing it?
Only if the drywall is fully dry, structurally sound, and shows no sign of mold. If those conditions are met, apply a shellac-based or oil-based stain-blocking primer directly over the stain before painting. Standard latex primer will not seal it, and the discoloration will bleed through within weeks. If the stain reappears after priming, the drywall is either still wet or the paper facing has been compromised and the panel needs to come out.
How long does it take for water-damaged drywall to dry out completely?
With air movers and dehumidifiers running continuously, drywall saturated by a clean-water leak typically dries in 3 to 5 days. Without that equipment, drying takes significantly longer and creates conditions where mold can take hold before the material is ready to patch. Check moisture readings daily with a moisture meter. Drywall should read at or below 1% moisture content and framing lumber below 19% before you close the wall [S3].
Will homeowners insurance cover water-damaged drywall repair?
It depends on the cause. Sudden and accidental damage, such as a burst pipe, is typically covered under a standard homeowners policy. Gradual leaks, flooding from outside the home, and damage from deferred maintenance are usually excluded. Document the damage thoroughly with photos before you touch anything, report the claim promptly, and keep all receipts for emergency mitigation work. The average water damage insurance claim in the U.S. runs $12,514, so it is worth filing even if you are uncertain about coverage.
Conclusion
Water-damaged drywall repair follows a clear sequence: stop the water, confirm the source category, dry the material completely, then cut out and replace what cannot be saved. Skipping the triage steps, especially water category identification and moisture verification, is what turns a straightforward patch job into a mold problem behind a fresh wall.
Before you buy materials, confirm your water category and check whether the drywall is still structurally sound. If the damage covers more than 10 square feet of mold, involves sewage or floodwater, or sits in a home built before 1978, get a professional assessment before you start cutting. That one check can save you from redoing the work a second time.