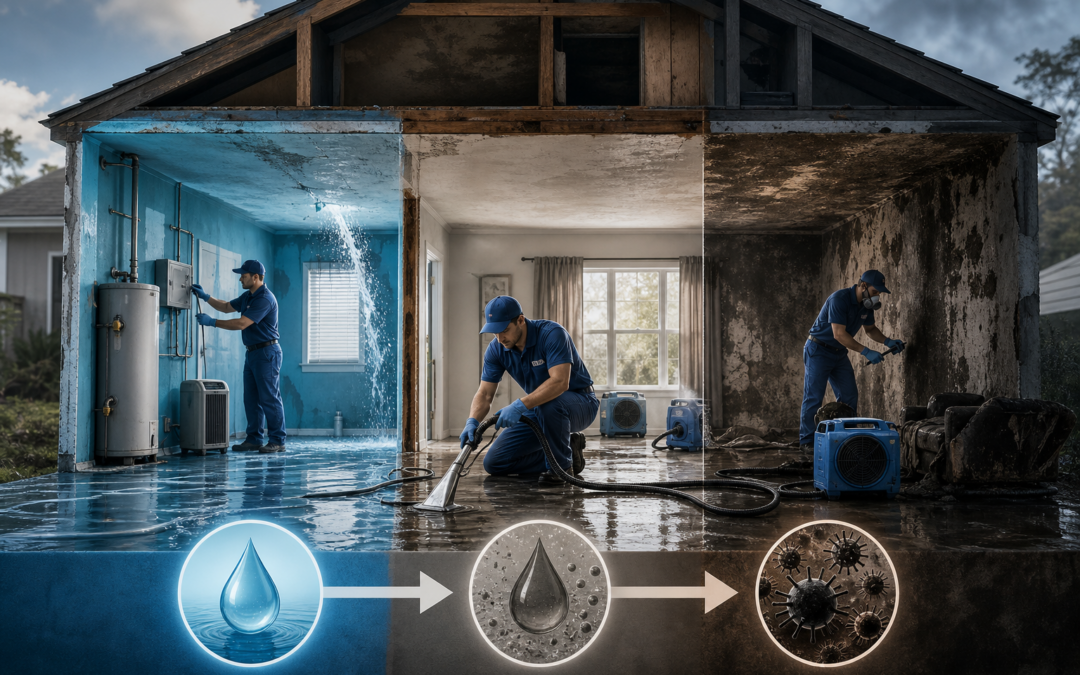
Water damage mitigation is the emergency phase of property recovery: stopping the water source, classifying the damage, extracting standing water, and running a calibrated drying system until moisture readings return to normal. It happens before remediation or restoration begins and directly affects whether your insurance claim is approved and how much secondary damage you face. Get this phase wrong, or skip steps, and you pay for it twice.
Most property owners conflate mitigation with the full repair process. They are not the same thing, and understanding the difference helps you verify that the crew on your property is actually doing their job.
Mitigation, Remediation, and Restoration: What Is the Difference?
These three terms describe three separate phases of work, done in sequence. Mixing them up leads to hiring the wrong contractor at the wrong time, or paying for work that was never completed.
Mitigation is the emergency response. Its job is to stop ongoing damage: shut off the water source, remove standing water, and get drying equipment running before secondary damage spreads. Nothing about mitigation repairs or replaces anything. It stabilizes the property.
Remediation addresses biological hazards that developed because of the water event. If moisture sat long enough for mold to take hold, remediation removes the affected materials, treats the structure, and clears the air. According to the Insurance Information Institute, water damage and freezing accounted for 27.6% of all homeowners insurance claims in 2022, and a significant share of those claims involve mold as a secondary consequence of slow or incomplete mitigation.
Restoration is the rebuild phase. Drywall goes back up, flooring gets replaced, and the property returns to its pre-loss condition. Restoration cannot begin until both mitigation and any necessary remediation are complete.
The sequence matters because each phase has different licensing requirements, different equipment, and different documentation standards. A contractor who skips straight to restoration without completing mitigation leaves moisture in the wall cavities. That moisture feeds mold, and the problem resurfaces months later.
If you have standing water or active moisture intrusion in a South Florida property, the full scope of services, from initial response through mold remediation, is covered under water damage dade county services.
For a deeper look at what happens after the emergency phase, What to Do After Water Damage in South Florida: A 2026 Action Plan walks through the decisions you face once mitigation is underway.
The Three Categories of Water and Why They Change Everything
The water that entered your property is not all the same. The restoration industry classifies water damage into three categories based on contamination level. The category determines the protective equipment a crew must wear, which materials can be dried in place versus removed, and how waste is disposed of.
Category 1: Clean water. This originates from a sanitary source, such as a broken supply line, an overflowing sink with no backflow, or a malfunctioning appliance inlet. There are no significant biological or chemical contaminants at the point of entry. Category 1 water can often be dried in place if extraction and drying begin quickly.
Category 2: Gray water. This carries chemical or biological contamination at a level that can cause discomfort or illness if a person is exposed to it. Sources include washing machine discharge, toilet overflow with urine but no feces, and HVAC condensate drain backups. In South Florida's climate, HVAC condensate leaks are a frequent culprit because systems run nearly year-round. Porous materials soaked with gray water, such as carpet padding and drywall, typically require removal rather than drying.
Category 3: Black water. This is grossly contaminated water containing pathogens, sewage, or floodwater that has contacted the ground. Sewage backups and storm surge are the most common sources locally. Category 3 requires full personal protective equipment for the crew, aggressive containment, and disposal of all porous materials that came into contact with the water. There is no drying Category 3 materials in place.
One detail that surprises most property owners: categories escalate over time. Category 1 water sitting in a warm, humid space for more than 24 hours begins to support microbial growth and moves toward Category 2 conditions. South Florida's heat accelerates that timeline. A slow response does not just mean more water to extract. It means a more contaminated job site, higher disposal costs, and a longer scope of work.
The category your crew assigns at the start of the job should appear in their written assessment. If it does not, ask for it before any work begins.
What Are the Steps Involved in the Water Mitigation Process?
Professional mitigation follows six steps in a fixed order. Each step depends on the one before it. A crew that skips source control and goes straight to extraction is wasting time, because water will keep entering the structure.
Here are the six steps a qualified mitigation crew performs on-site:
-
Stop the flow of water and control the source. Before any equipment is placed, the moisture source must be stopped. That means shutting off the main water supply, isolating a leaking HVAC line, or coordinating with a plumber if the break is structural.
-
Perform assessment and moisture mapping. Technicians use thermal imaging cameras and moisture meters to map how far water has traveled inside walls, under flooring, and into subfloor materials. This step determines the full scope of work and establishes the baseline readings that drying progress will be measured against. The assessment also determines the water category, which drives every subsequent decision.
-
Extract standing water and surface moisture. Truck-mounted or portable extraction units remove standing water from floors and saturated surfaces. This step reduces the total moisture load before drying equipment is deployed. Extraction is faster and more energy-efficient than evaporation alone, so thorough extraction shortens the overall drying time. Water mitigation services typically cost between $1,300 and $5,200 depending on building size and damage severity, and the volume of water extracted is one of the variables that pushes costs toward the higher end.
-
Deploy the drying system based on psychrometric calculations. Psychrometrics is the science of how temperature, humidity, and airflow interact: warm, moving air holds more moisture than cool, still air, so technicians use this principle to set up a system where air movers push warm, dry air across wet surfaces, pulling moisture into the air, and commercial dehumidifiers then strip that moisture from the air before it can redeposit elsewhere. Equipment placement is calculated, not guessed. The number of air movers and dehumidifiers, their positions, and the target temperature in the space are all determined by the readings from step two.
-
Monitor progress and adjust equipment placement. Technicians return daily to take new moisture readings and compare them against the baseline. If a wall cavity is drying slower than expected, equipment gets repositioned. If a section reaches its target moisture content ahead of schedule, equipment there can be removed. Monitoring logs record every reading with a date and time, which matters for insurance documentation.
-
Complete final documentation and closeout. When all moisture readings return to pre-loss normal levels, the job is closed out. The final report includes the initial moisture map, daily monitoring logs, equipment placement records, photos, and the final readings. This package is what an insurance adjuster needs to validate the claim. A mitigation company that does not produce this documentation is leaving you without the evidence to support reimbursement.
How Much Does Water Damage Mitigation Cost?
Water mitigation services typically cost between $1,300 and $5,200 depending on building size and the severity of the damage. That range covers the mitigation phase only: source control, extraction, drying, and documentation. It does not include remediation, structural repairs, or any rebuild work.
Several variables push costs toward the higher end of that range. A larger affected area requires more extraction equipment and more air movers and dehumidifiers running for longer. A Category 3 water event adds disposal costs for contaminated materials and requires full containment. Delays between the water event and the start of mitigation increase the scope because moisture migrates further into wall cavities, subfloor materials, and insulation the longer it sits.
For residential properties, the mitigation cost usually reflects a single affected zone, a bathroom, a utility room, or a section of finished basement. Commercial properties are a different picture. According to Chubb, the average commercial water damage loss reaches $89,000 USD. That figure covers the full loss, not mitigation alone, but it signals how quickly a water event scales in a larger building with more affected square footage, more structural materials, and more equipment at risk.
Insurance typically covers mitigation costs when the water event is sudden and accidental, such as a burst pipe or appliance failure. Between 2018 and 2022, the average insurance claim for water damage and freezing was $13,954. That is a claim payout, not a mitigation-only figure, but it gives you a realistic sense of what insurers expect to pay out when the full scope of damage is documented.
Get a written estimate before work begins. Ask the contractor to break out extraction, drying, and documentation costs separately so you can see exactly what you are paying for.
What Is the Most Common Cause of Water Damage in Houses?
Plumbing failures and appliance malfunctions cause most residential water damage claims. Burst pipes, supply line failures behind washing machines and refrigerators, and water heater failures account for a large share of events. In North America, 75% of water heaters fail before reaching 12 years of age, making an aging water heater one of the more predictable risks in any home.
According to the Insurance Information Institute's 2026 report, water damage and freezing were responsible for 27.6% of all homeowners insurance claims in 2022. That share makes it one of the most common claim types filed.
Freezing pipes are rare in Florida, but HVAC condensate drain backups are common because air conditioning systems run nearly year-round. Storm-driven water intrusion through roofs, windows, and doors is a seasonal risk from June through November. Flat or low-slope roofs, common on older South Florida construction, are especially vulnerable after a heavy rain event.
Identifying the moisture source is the first step in the mitigation process for a reason. If the source is not confirmed and stopped before drying begins, the equipment runs against an active leak. The cause also determines the water category, which shapes every decision that follows. A condensate backup is Category 2. Floodwater from a storm surge is Category 3. Same wet floor, very different scope of work.
For more detail on what to do immediately after a water event in this region, What to Do After Water Damage in South Florida: A 2026 Action Plan covers the first actions to take before a crew arrives.
Insurance Documentation Checklist for Water Damage Claims
An insurance adjuster cannot approve a claim on your word alone. They need a paper trail that proves the damage was sudden, that mitigation was performed correctly, and that the scope of work was necessary. The average water damage claim between 2018 and 2022 was $13,954, and claims that lack documentation are routinely underpaid or denied.
Gather and preserve the following records during and after mitigation:
- Photos and video of the damage before work begins. Capture every affected room, all standing water, and any visible source of the leak. Time-stamped images carry more weight than undated ones.
- Written assessment from the mitigation crew. This should include the water category, the moisture map with baseline readings, and the scope of work.
- Equipment placement records. A log showing which air movers and dehumidifiers were placed, where, and when.
- Daily moisture monitoring logs. Each technician visit should produce a dated entry with updated readings for every monitoring point.
- Photos of materials removed. If saturated drywall, flooring, or insulation was taken out, document it before disposal.
- Final moisture readings. The closeout report confirming all readings returned to pre-loss normal levels.
- Invoices and line-item estimates. A breakdown of costs by task, not a single lump sum.
- Communication records. Emails, texts, or notes from conversations with your contractor and your insurer, including dates.
Keep copies of everything in a single folder, physical or digital. Your insurer may request any of these items weeks after the work is complete.
Water Damage Mitigation Near You: Florida, Texas, and California
If you are in South Florida, confirm your mitigation company holds IICRC certification (the Institute of Inspection, Cleaning and Restoration Certification, the industry's main credentialing body), responds around the clock, and provides written moisture mapping from the first visit. Royal Mold FL covers South Florida properties with IICRC-certified technicians available around the clock.
Prices and plan limits verified as of October 2026.
FAQs
Does homeowners insurance cover water damage mitigation costs?
Most standard homeowners policies cover mitigation costs when the water event is sudden and accidental, such as a burst pipe or appliance failure. Gradual leaks or maintenance-related failures are typically excluded. Document everything before work begins and notify your insurer as early as possible. Your mitigation contractor's written assessment, moisture logs, and final closeout report are the records an adjuster will ask for.
How long does the water mitigation drying process typically take?
Most residential drying cycles run three to five days when equipment is deployed promptly and the affected area is limited to one or two rooms. Larger areas, Category 2 or 3 water events, or delays in starting mitigation can extend that timeline. Technicians take daily moisture readings and remove equipment only when all readings return to pre-loss normal levels, not on a fixed schedule.
Can I do water damage mitigation myself, or do I need a professional?
For a very small Category 1 event, such as a minor appliance overflow caught within an hour, a homeowner with a wet-dry vacuum and fans may manage surface drying. Anything involving Category 2 or 3 water, significant saturation of walls or subfloor, or a space larger than a single small room requires professional equipment and moisture mapping. Without a baseline moisture map, you have no way to confirm the structure is actually dry before closing it up.
What happens if water damage is not mitigated quickly enough?
Moisture that sits in wall cavities, subfloor materials, and insulation migrates further and supports microbial growth. Category 1 water can shift toward Category 2 conditions within 24 hours in a warm, humid environment. The longer mitigation is delayed, the more porous material must be removed rather than dried in place, which raises both the cost and the scope of any subsequent remediation. Secondary mold damage can also complicate or reduce an insurance payout.
What certifications should a water damage mitigation company hold?
The IICRC, the Institute of Inspection, Cleaning and Restoration Certification, sets the primary standards for the restoration industry. Look for technicians certified under IICRC's water damage restoration standards. State contractor licensing requirements vary, so confirm the company holds the appropriate license for your state. Ask to see both before work begins, not after.
Conclusion
Water damage mitigation is a distinct, time-sensitive phase that determines what your repair costs, your mold risk, and your insurance outcome will look like. It covers six steps in a fixed order: source control, moisture mapping, extraction, calibrated drying, daily monitoring, and final documentation. Skipping or shortcutting any of those steps leaves moisture in the structure and gaps in the paper trail an adjuster needs.
Before you hire anyone, confirm they will produce a written moisture map at the start and a full closeout report at the end. Those two documents are the clearest signal that a crew is doing real mitigation, not just running fans. Those two documents are your clearest protection against underpaid claims and hidden moisture problems down the road.